Make DIY papel picado banners for Día de Muertos
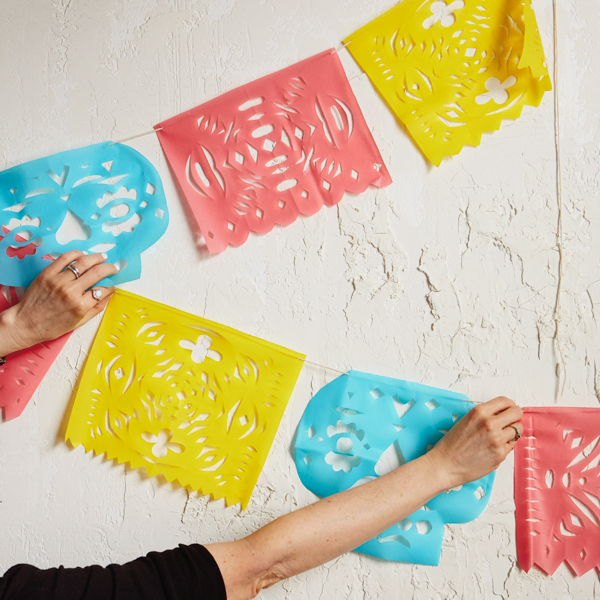
Those colorful, festive cut paper banners you see on Día de los Muertos (Day of the Dead) altars and at Mexican celebrations are papel picado. Traditionally, these pieces of Mexican folk art were chiseled by hand from stacks of tissue paper using designs that varied based on the occasion.
All we had to do was whisper the words “cut tissue paper” to Hallmark Lettering Artist Lynn Giunta and suddenly we had three designs—and free templates—for DIY papel picado.
Inspired? Create and share by tagging @HallmarkStores.
How to make papel picado

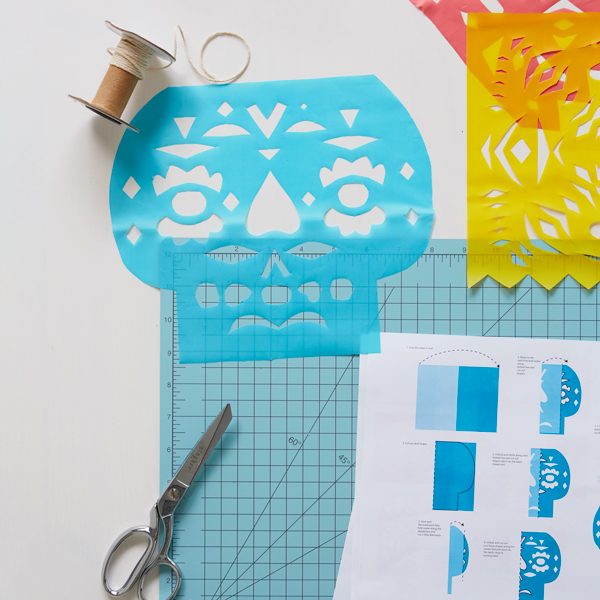
Supplies for DIY papel picado
- FREE papel picado instructions and templates (print on plain copier paper)
- Tissue paper or lightweight plastic table covers in bright colors
- Scissors (or craft knife and cutting mat, if you prefer)
- String
- Hole punch and tape or glue
Every design is a little different
The templates for each of the banner designs shown here work a little bit differently. We’ll cover the basics for the skull design here, but you’ll want to follow the instructions printed on the specific designs you’re going to make.
First, print the paper template and instructions for each design—or just pick one you like. We’ve color coded the templates so you can see which design is which. But obviously, you can make any design on whatever color or colors you want to. (For example, you might want a long string of just multicolored skulls, and it goes without saying that it would be awesome.)
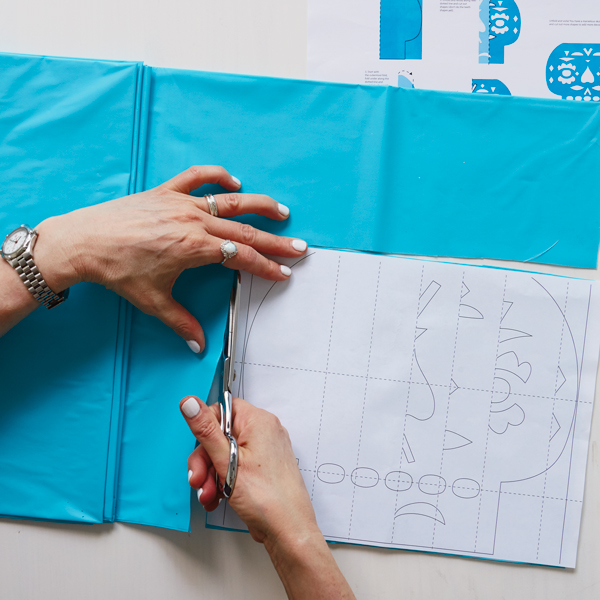
Trim the template and tissue paper
Trim about a half-inch off each side of the paper template.
Cut sheets of tissue paper or plastic table cover to the same size as your template.
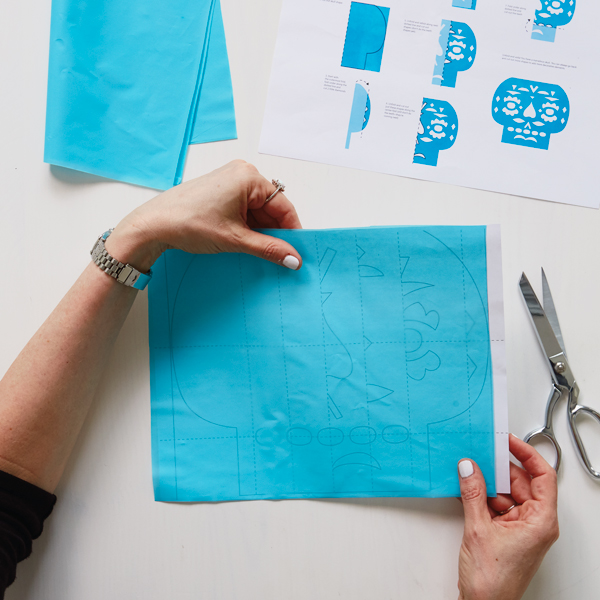
Put the tissue or plastic over the template
Start off by putting the template under a single sheet of paper or plastic to get the hang of making the papel picado. Follow the printed instructions for each design to fold and cut each one.
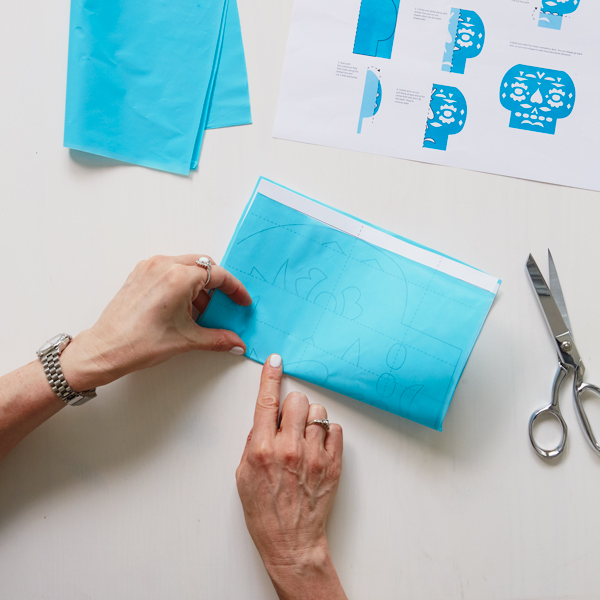
Try it out with a practice banner
Get a feel for folding and cutting with a practice banner. Press gently to fold the tissue paper or plastic table covers over the template to avoid tearing or stretching them. Use your sharpest scissors to make the cuts.
If you’re using a craft knife, use a fresh blade and work on a cutting mat.
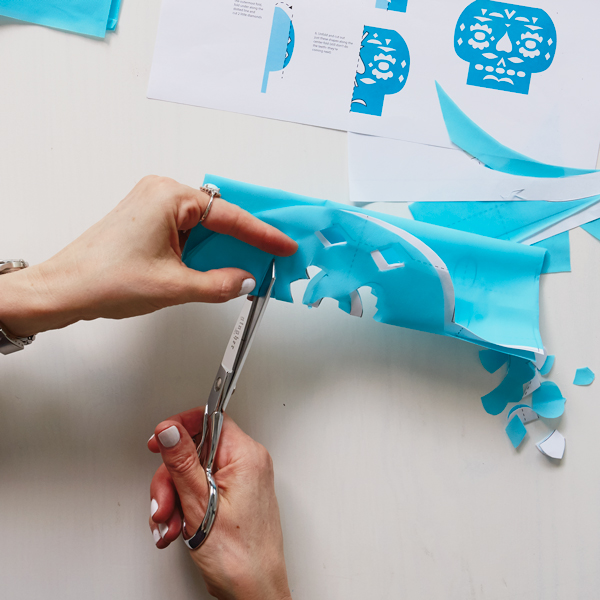
Make your cuts carefully
Make sure to cut all the way through. If you leave corners unsnipped or don’t connect lines, your papel picado can rip when you unfold it and remove the template
And that’s the next step: Very carefully unfold your papel picado and pull the template away from the tissue paper or plastic.
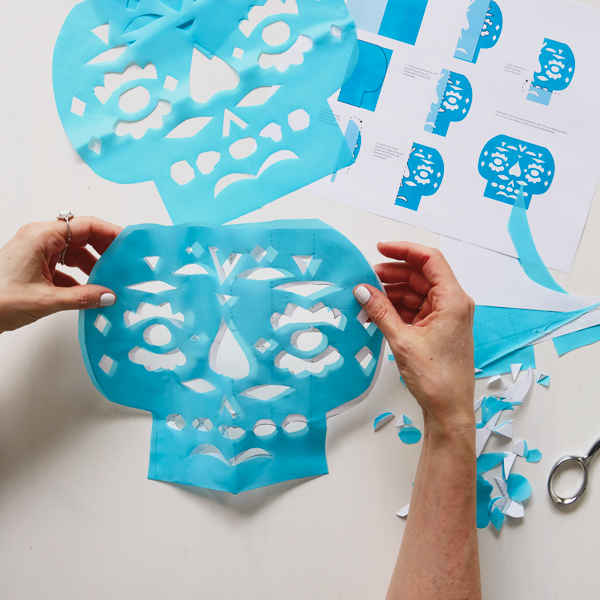
Once you've got it down, improvise
You can use a few sheets of paper or plastic at a time once you’ve mastered the folding and cutting.
And you can ditch the template: Follow the same steps for folding but try improvising the cut patterns.

String all your banners together
To create your papel picado garland, you try either of these two ways:
Punch holes in the two top corners of each papel picado and string your designs to make a banner (a little bit of tape over the holes will keep them from sliding)
Fold the top of the papel picado over the string and glue it down (this is easier to do with tissue paper).
Reasons to hang your DIY papel picado banners
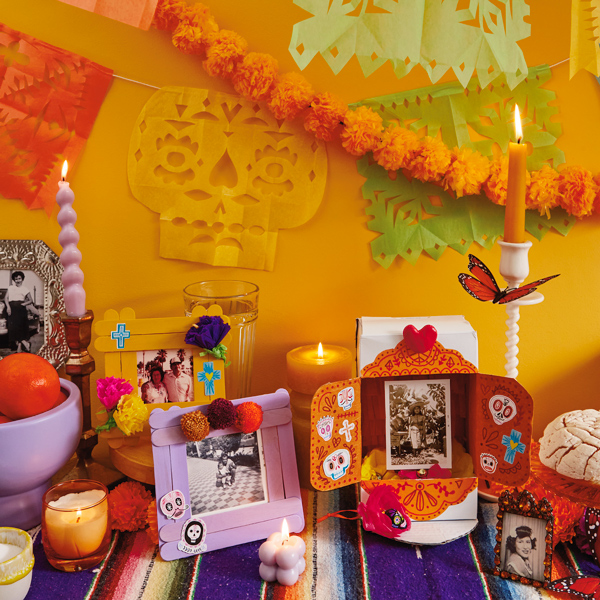
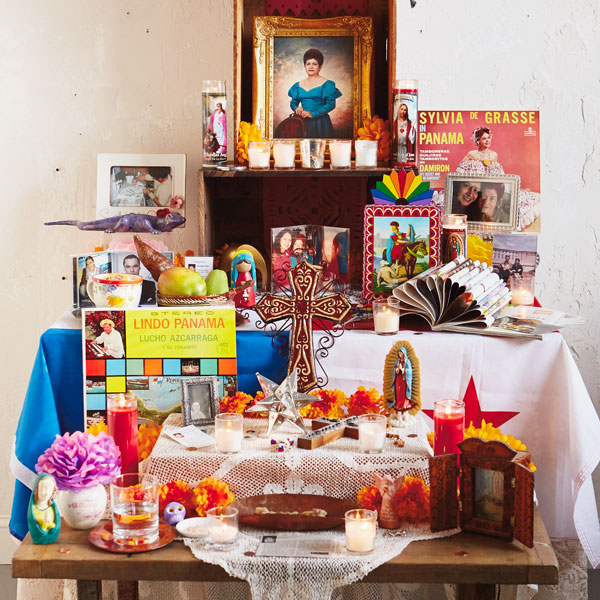
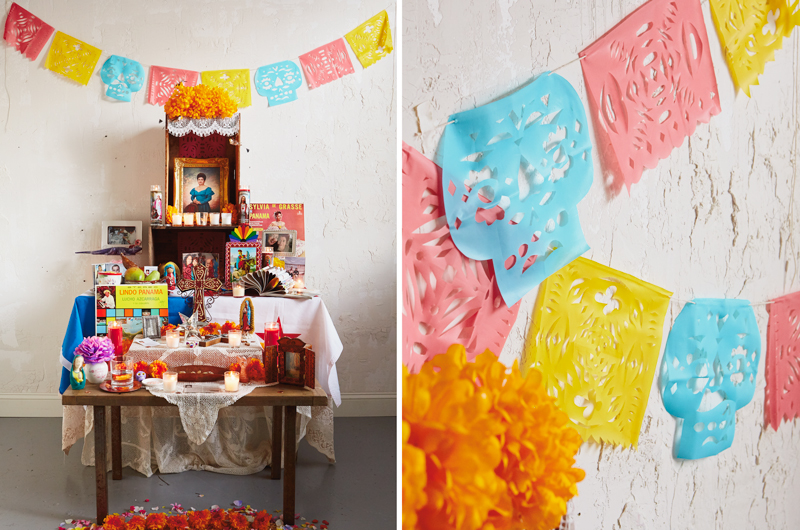
Papel picado banners are hung to celebrate holidays and special occasions—especially Día de Muertos. You can use yours to represent the element wind in a Day of the Dead altar. Learn about the ritual of creating an ofrenda here.
Experiment with different designs and create banners for your next celebration—and leave them up to enjoy for a while.
You may also like
See more-

Arts, Crafts & DIY Día de Muertos crafts to celebrate with family
The sweet smell of pan de muerto baking, colorful decorations and pictures selected with care, special memories being...
-
Fall Día de Muertos: A celebration of life and love
Día de Muertos, Day of the Dead, is a holiday originally celebrated in the southern and central parts of Mexico and i...
-
Fall How to write literary calaveras for Día de Muertos
You’ve made your ofrenda (altar), hung your papel picado (paper banners), and decorated your calaveras de azúcar (sug...
-
Fall DIY calaveras de azúcar: How to make sugar skulls for Día de Muertos
Calaveras de azúcar—literal sugar skulls—are beautiful pieces of
-
Fall How to make a Day of the Dead altar: A personal story
Understand the traditions of Day of the Dead through one Hallmarker's story
-
Arts, Crafts & DIY Day of the Dead Sugar Skull Coloring Page
Day of the Dead, Día de Muertos—a celebration of loved ones who have passed away—originated in Mexico and is obser...